*FYI - this post may contain affiliate links, which means we earn a commission at no extra cost to you if you purchase from them. Also, as an Amazon Associate I earn from qualifying purchases. Check out our Privacy Policy and Disclosure for more info.
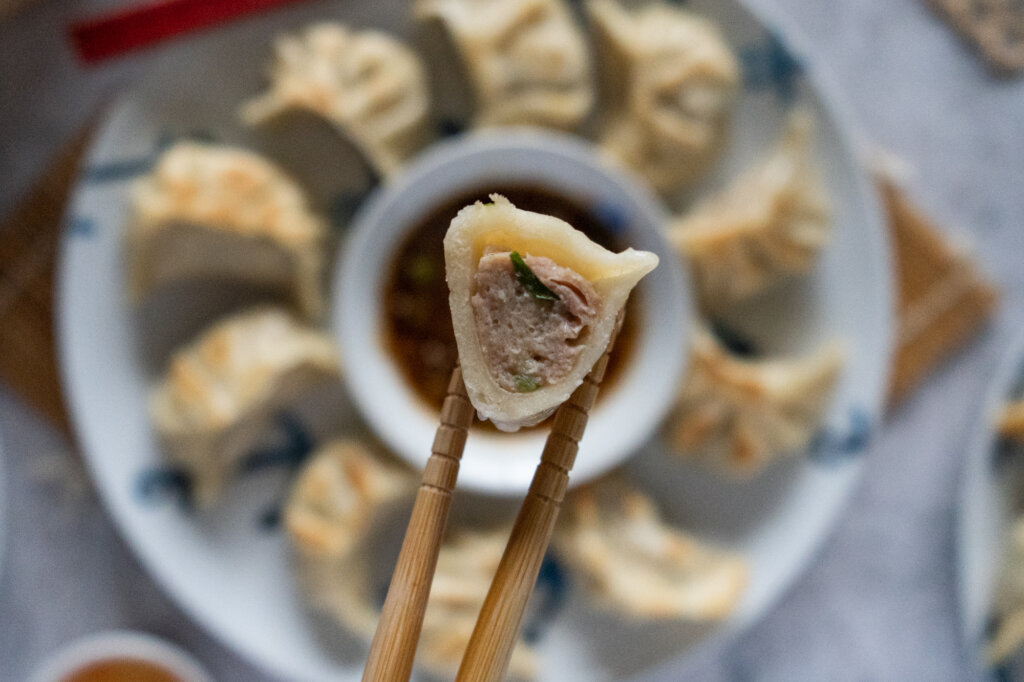
If there’s one thing I could eat a hundred of in one sitting, it might just be these pork and chive dumplings.
Consisting of a juicy pork and chive filling wrapped in a delicate skin that’s steamed and fried to perfection… wow – there truly are no words.
And once you get the technique down, you’ll be surprised to see just how easy it is to make your own at home!
So, keep scrolling for our foolproof Pork and Chive Dumpling recipe. You’ll definitely be catching fillings for it.
Ingredients for Our Pork and Chive Dumpling Recipe
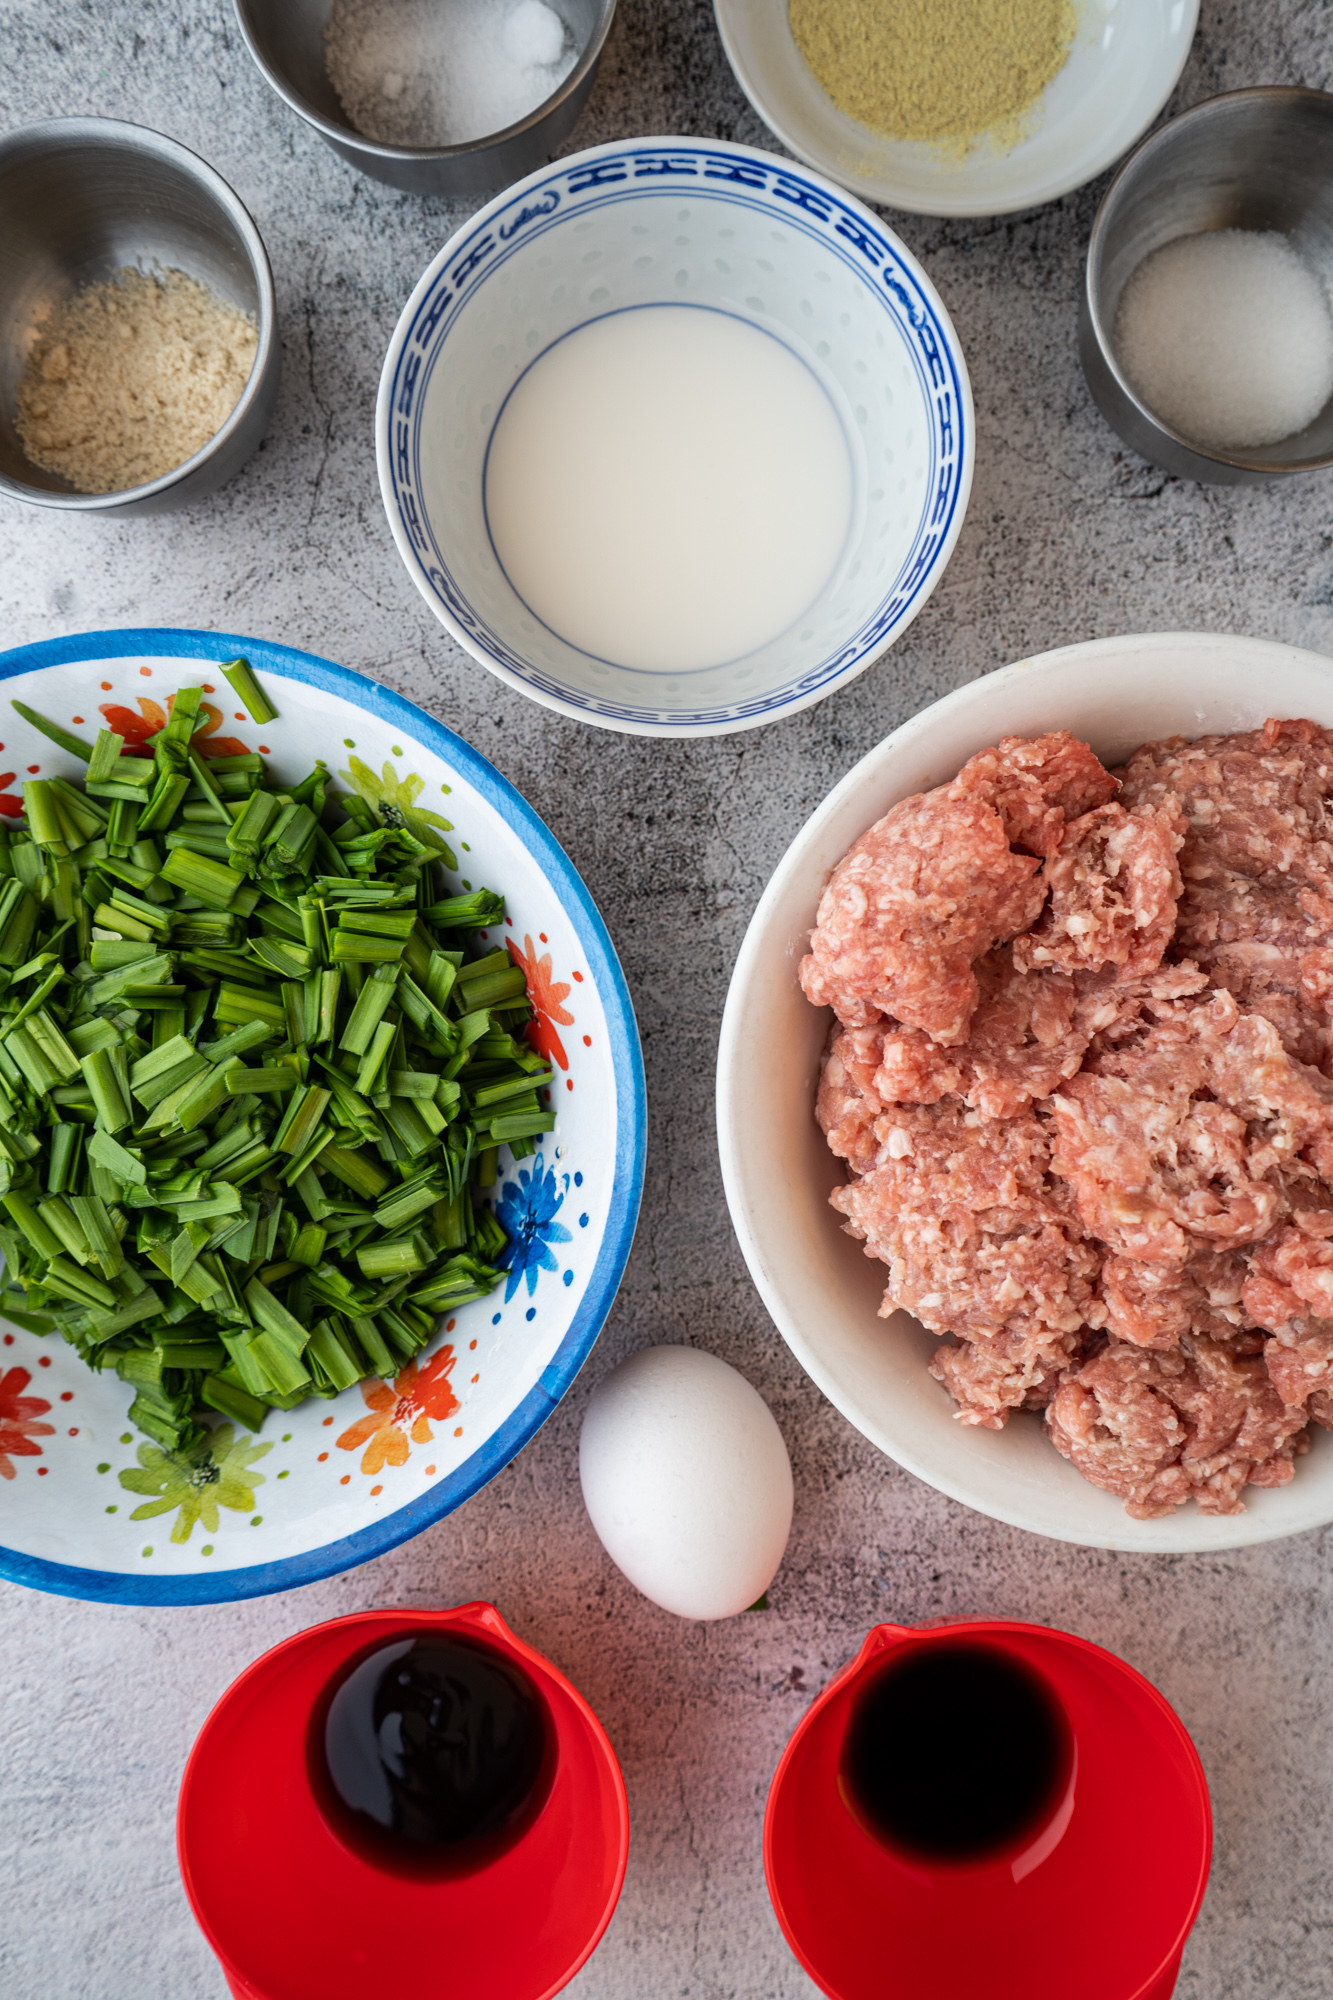
- 1 250g pack round dumpling skins/wrappers (or use our dumpling wrapper recipe)
- 500g (1 pound) Ground Pork
- 400g (14 oz) Chinese Chives, finely diced
- 1 tsp salt
- 1 tsp sugar
- 1 tsp chicken broth mix
- 1 tsp soy sauce
- 1 tsp oyster sauce
- A pinch of white pepper
- 1 egg
- 1 tbsp cornstarch
- 3 tbsp water
- 1 tbsp sesame oil
Step by Step Instructions for Our Pork and Chive Dumpling Recipe
Homemade pork and chive dumplings might be a bit of a laborious endeavor, but the reward of fresh dumplings is well worth the effort. Here are the step by step instructions!
To prep the chives, chop them into small pieces.
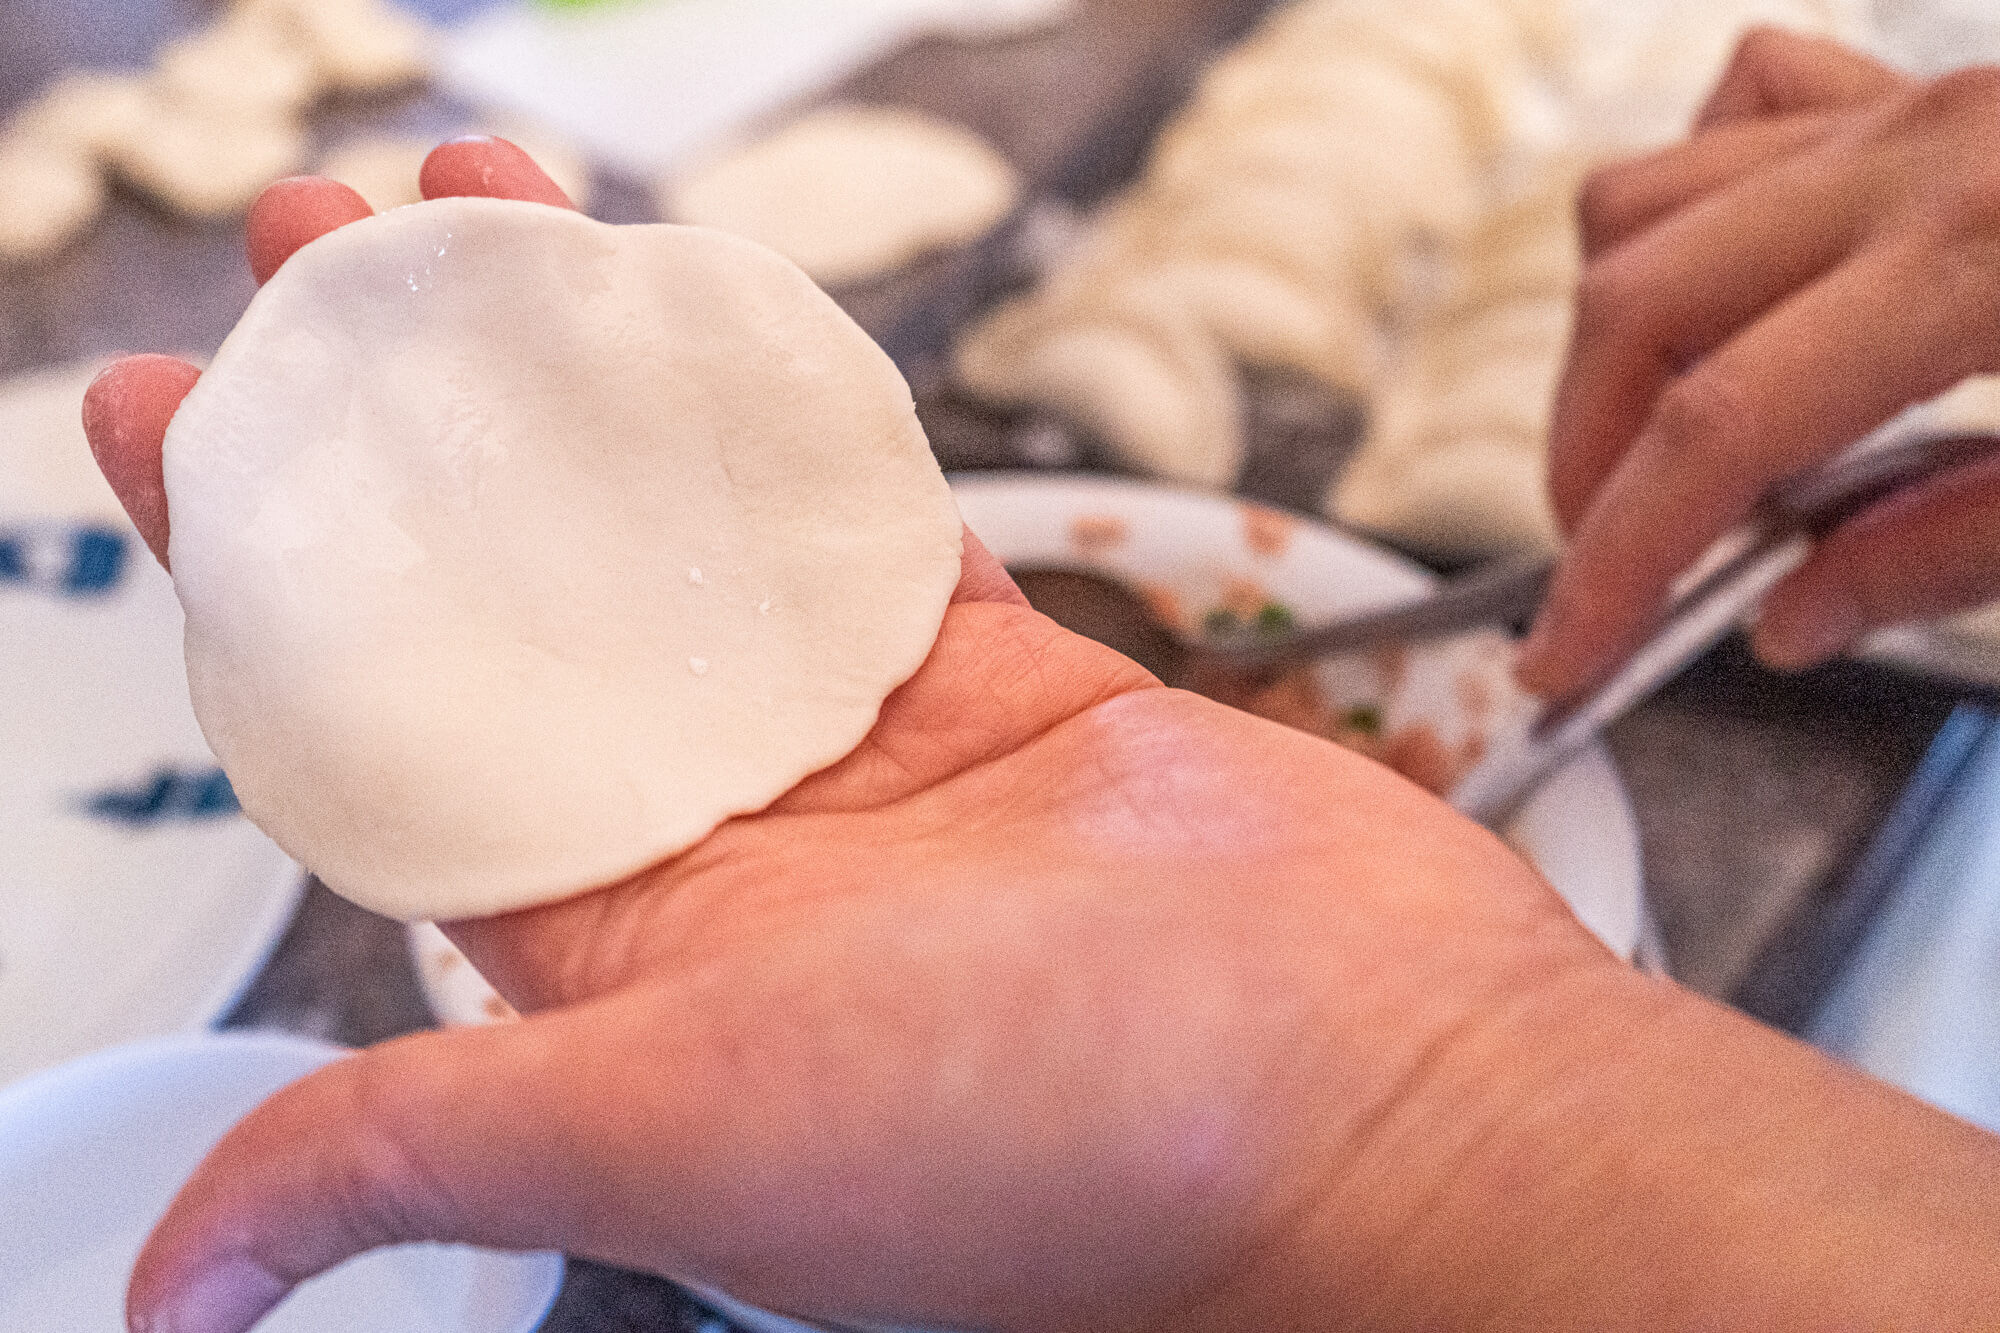
For the wrappers, either save time and go with storebought dumpling skins, or make them in advance through our dumpling wrapper recipe. Fresh homemade wrappers do take longer, but they’re surprisingly much easier to fold, if that makes a difference in your decision!
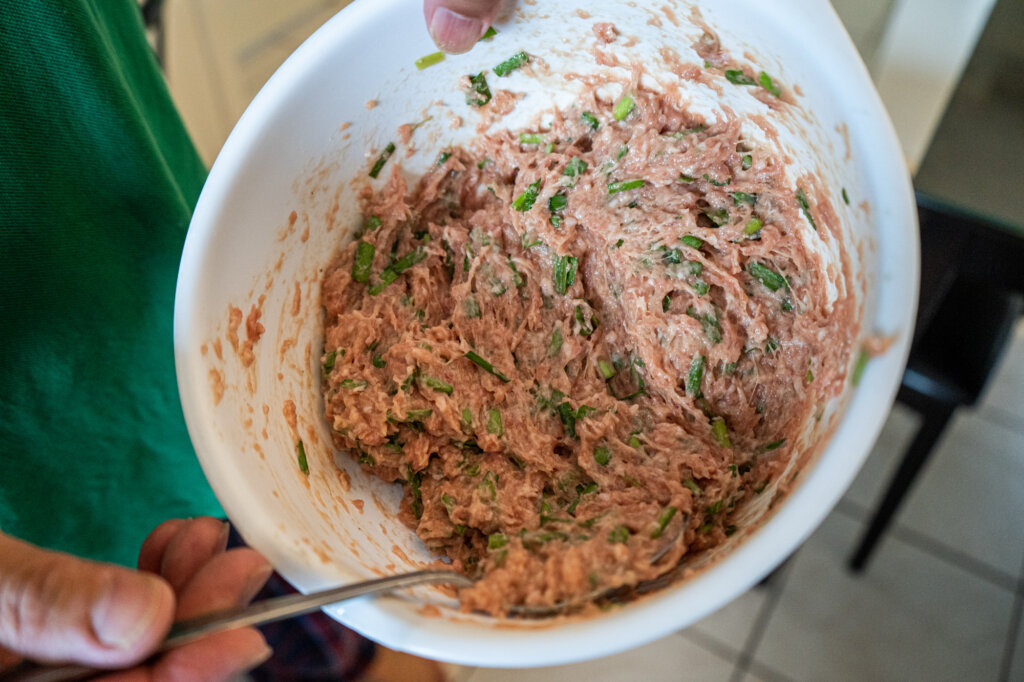
Then, in a large bowl, mix in all your ingredients (apart from the wrappers).
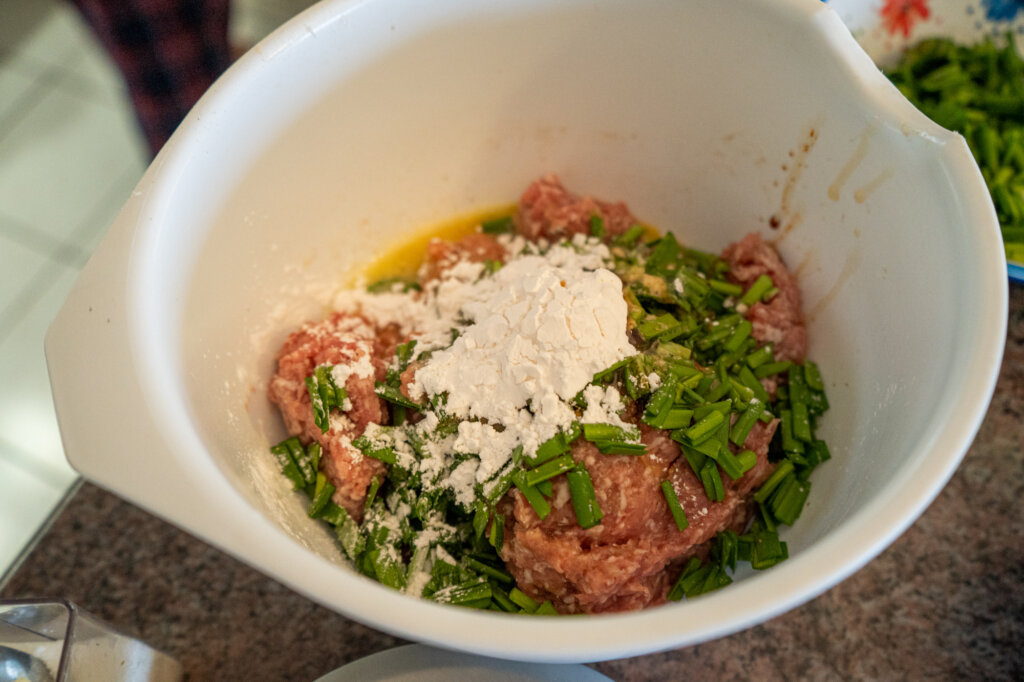
Use a fork to stir everything clockwise for 2-3 minutes until well-mixed, with a whipped looking texture. Then store it in the fridge for 30 minutes or so for it to firm up.
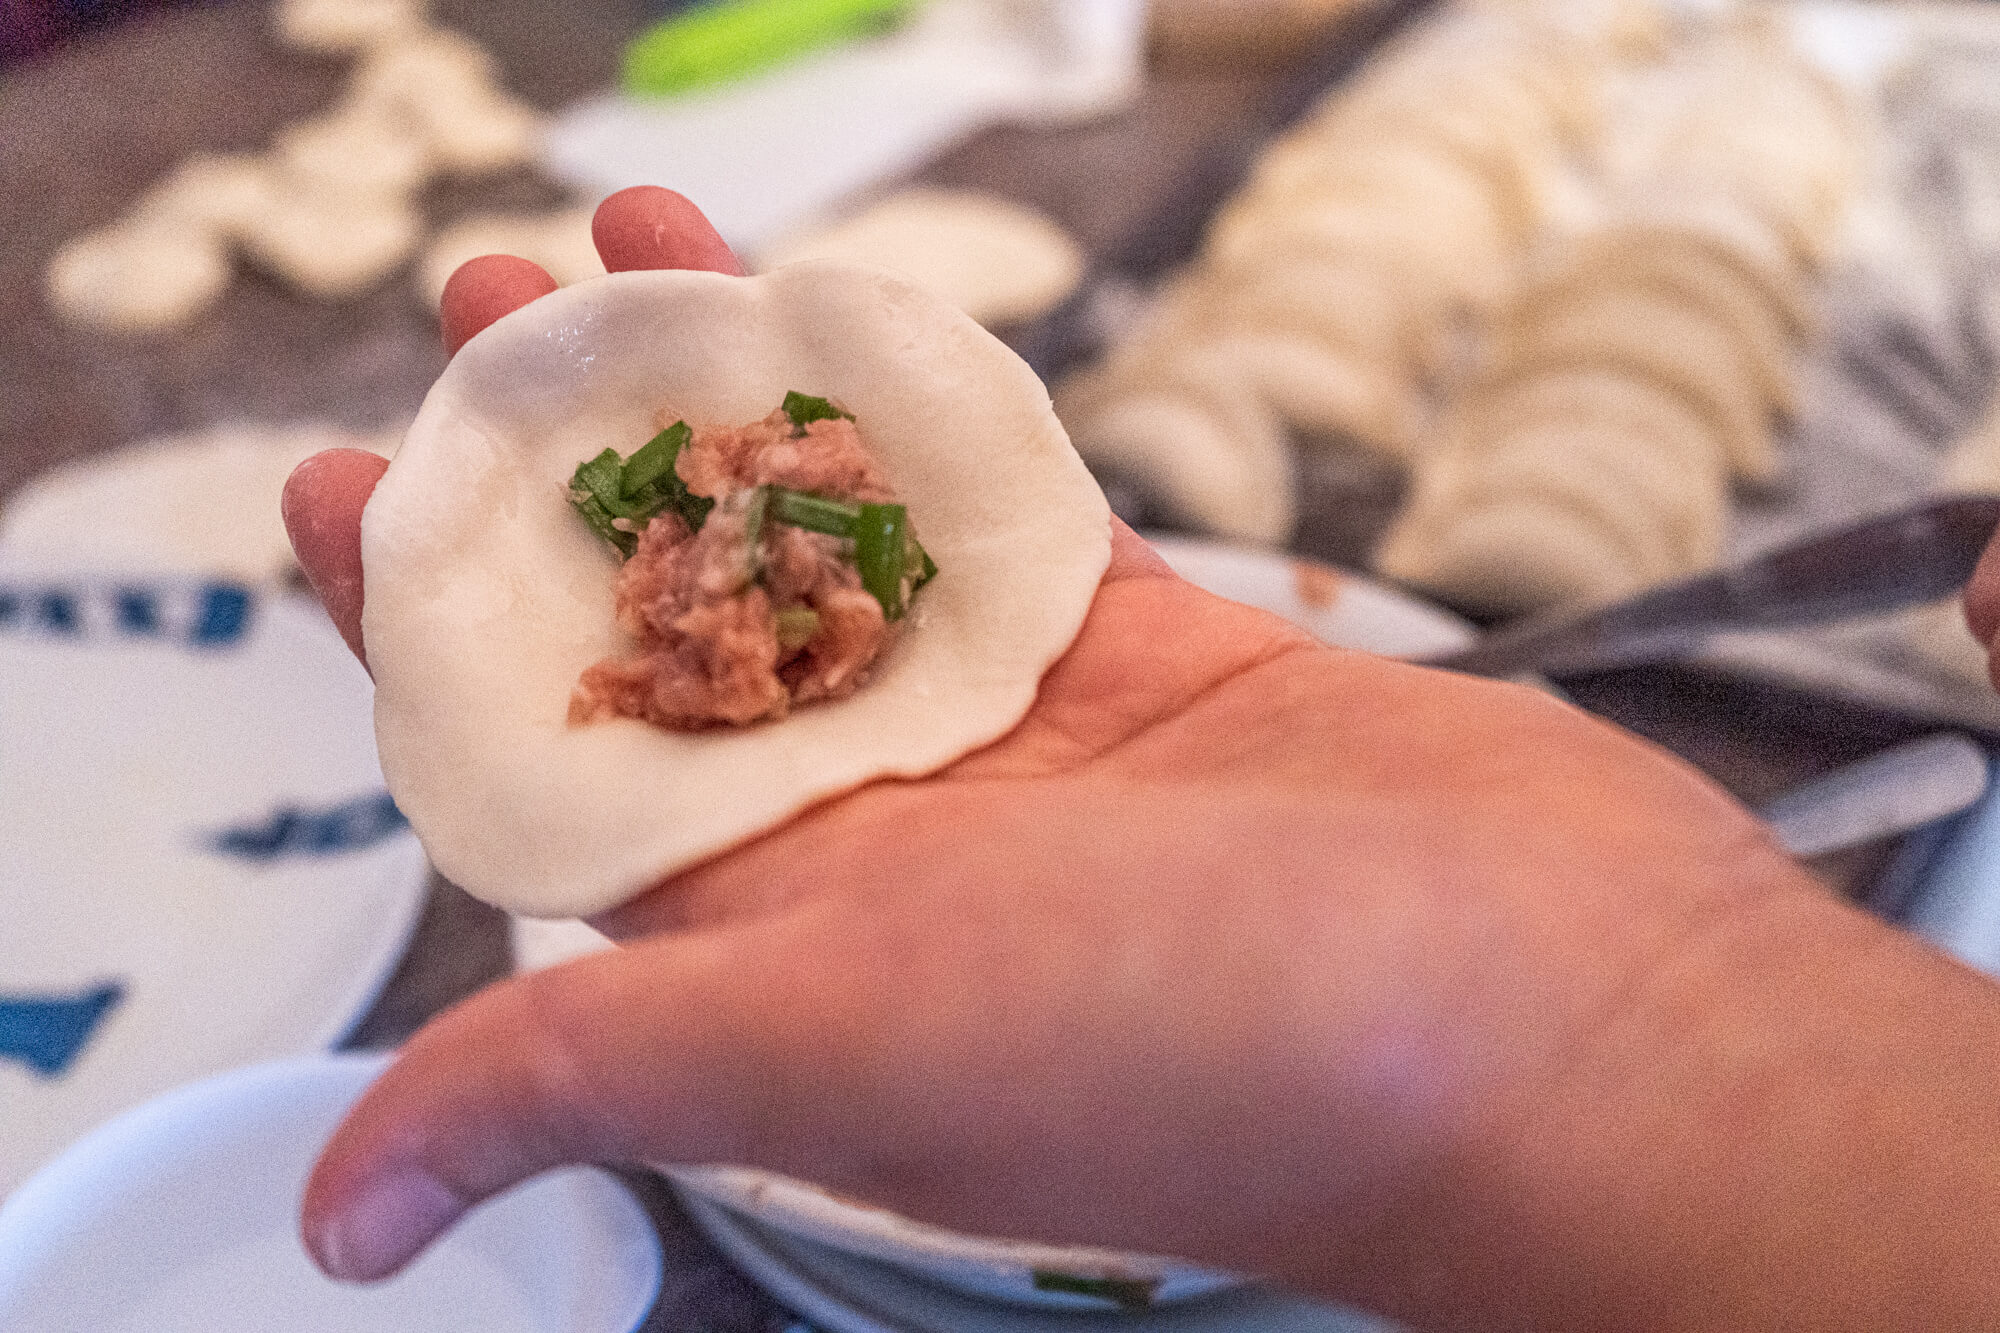
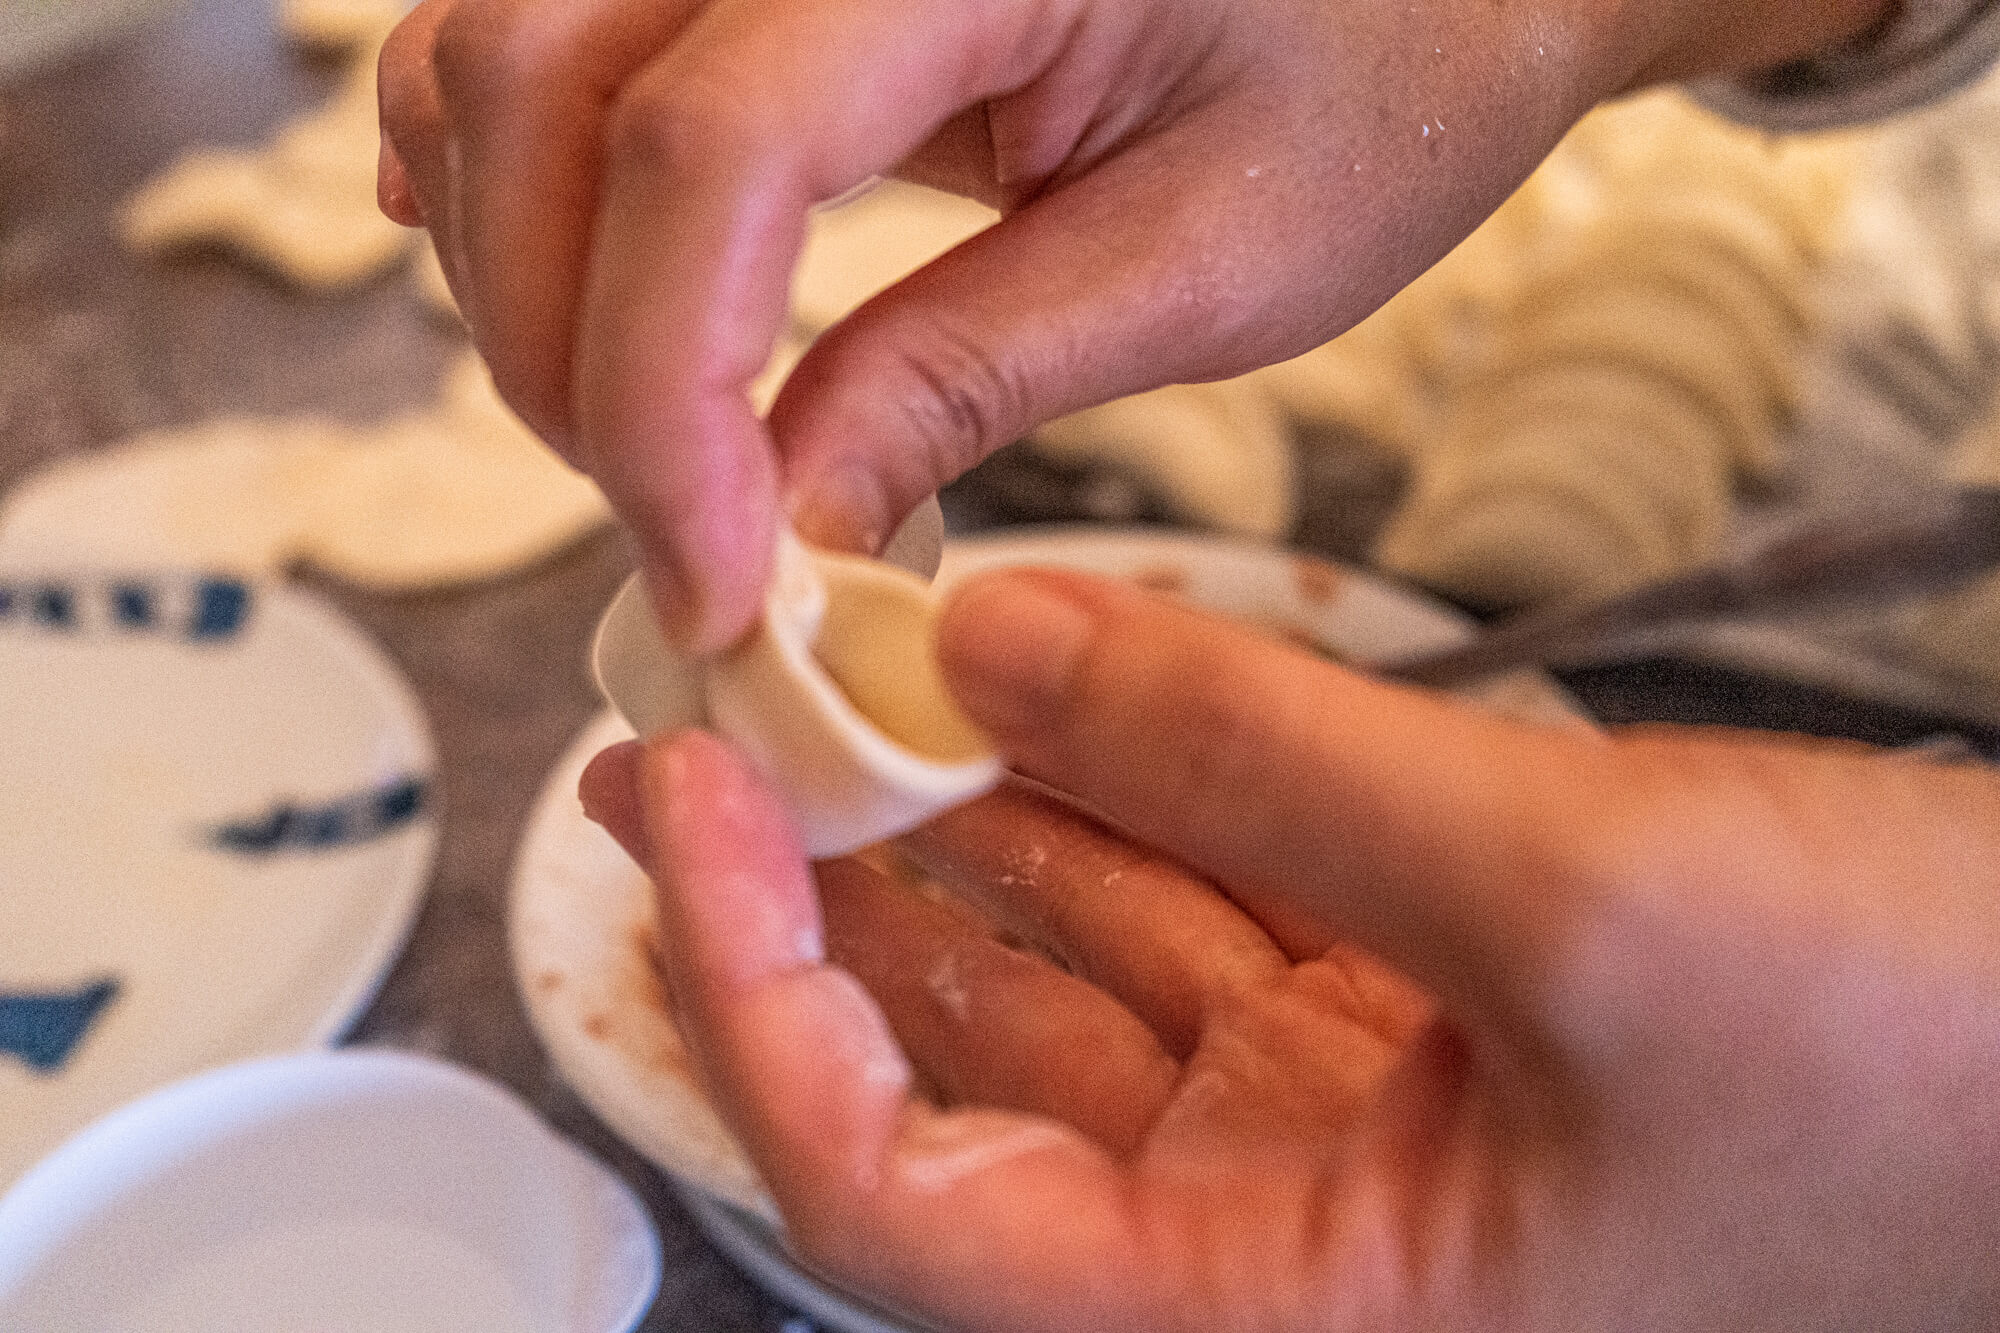
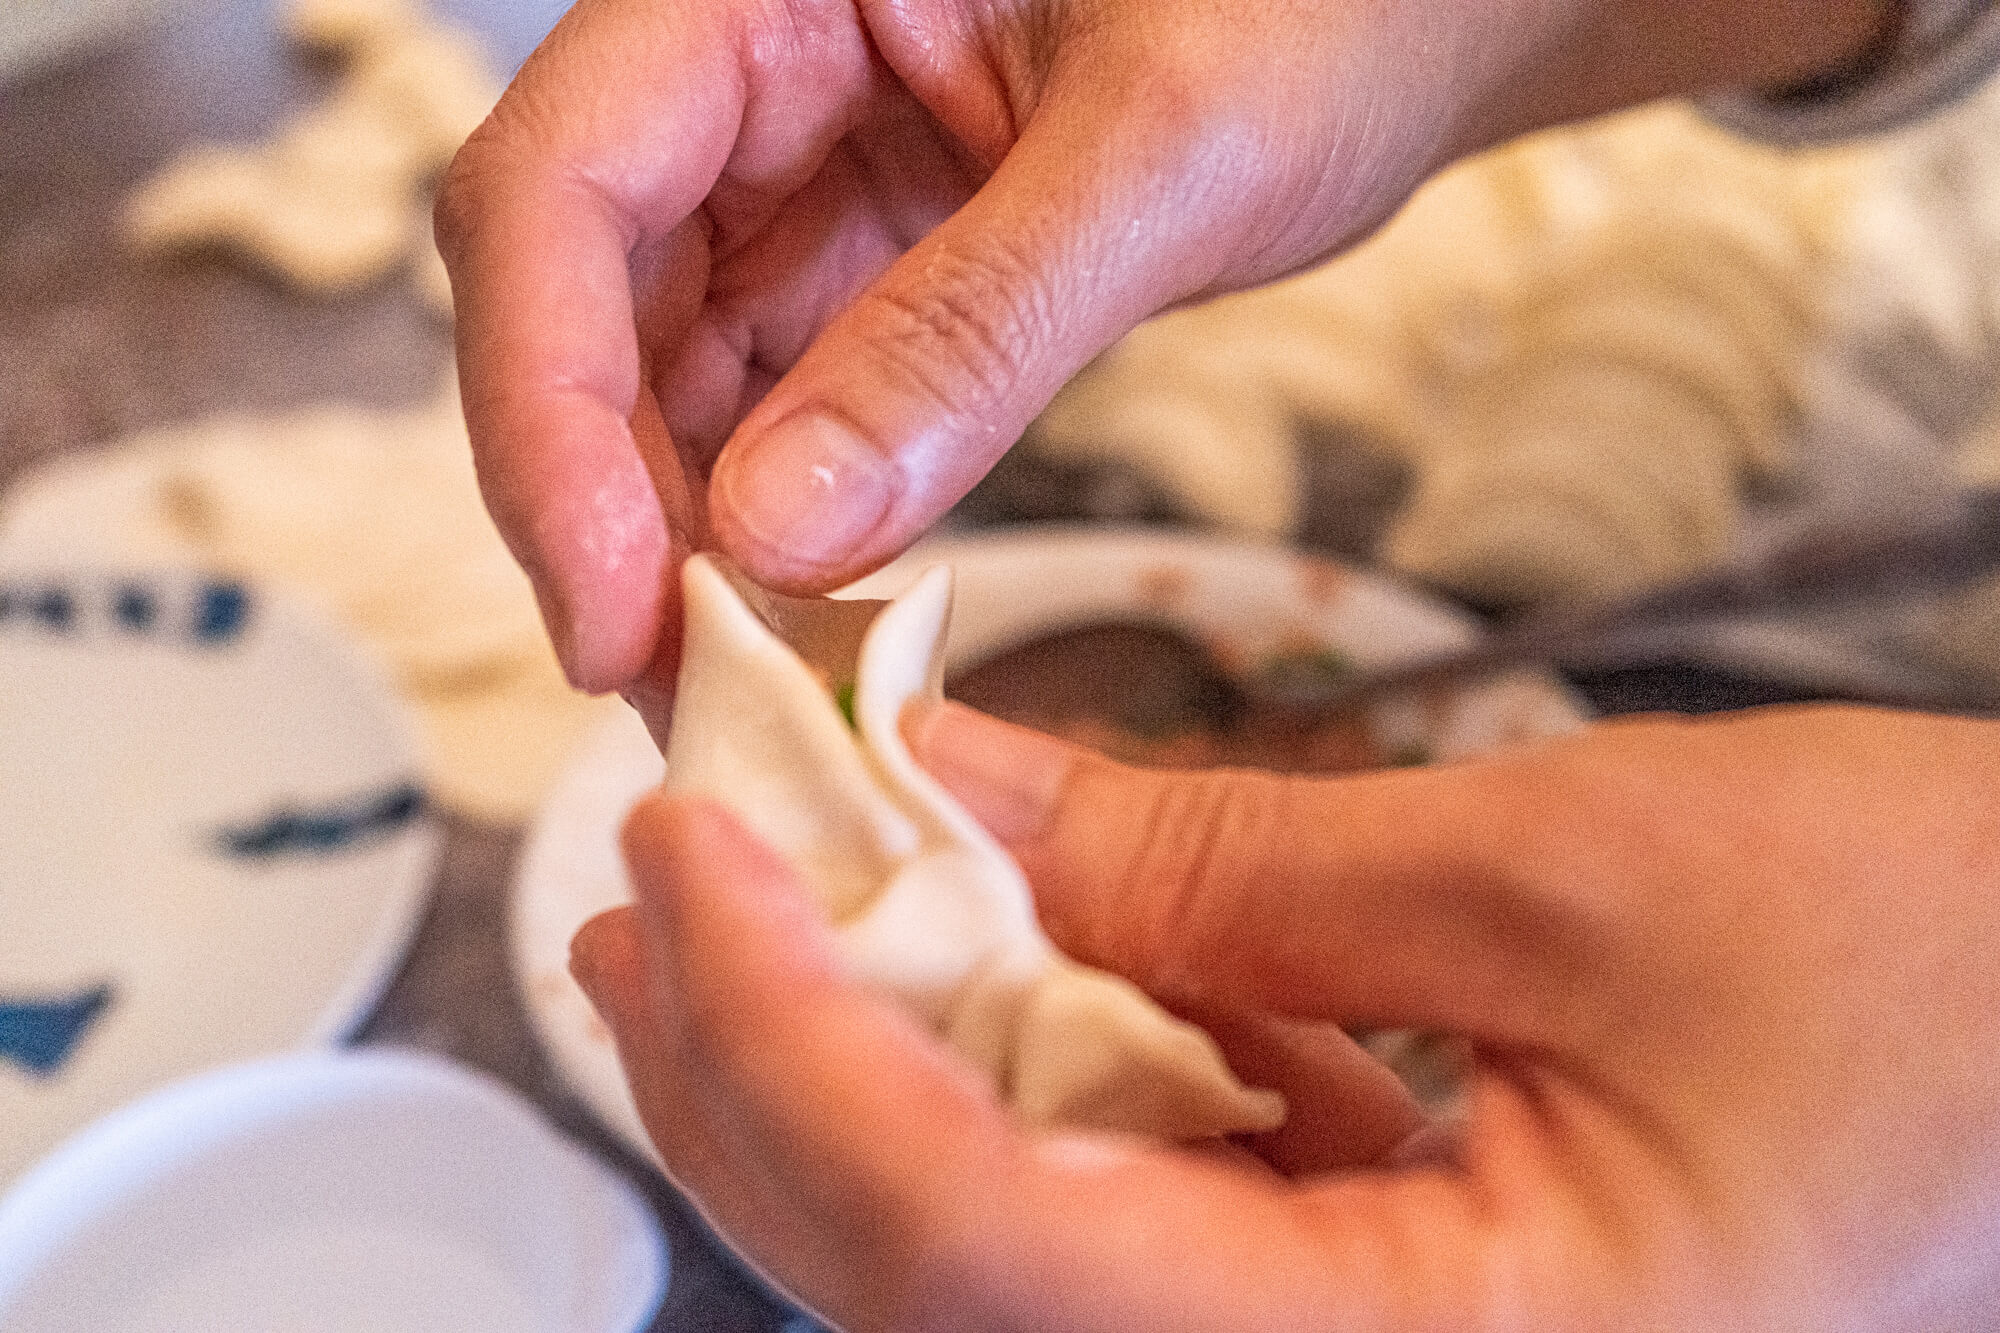
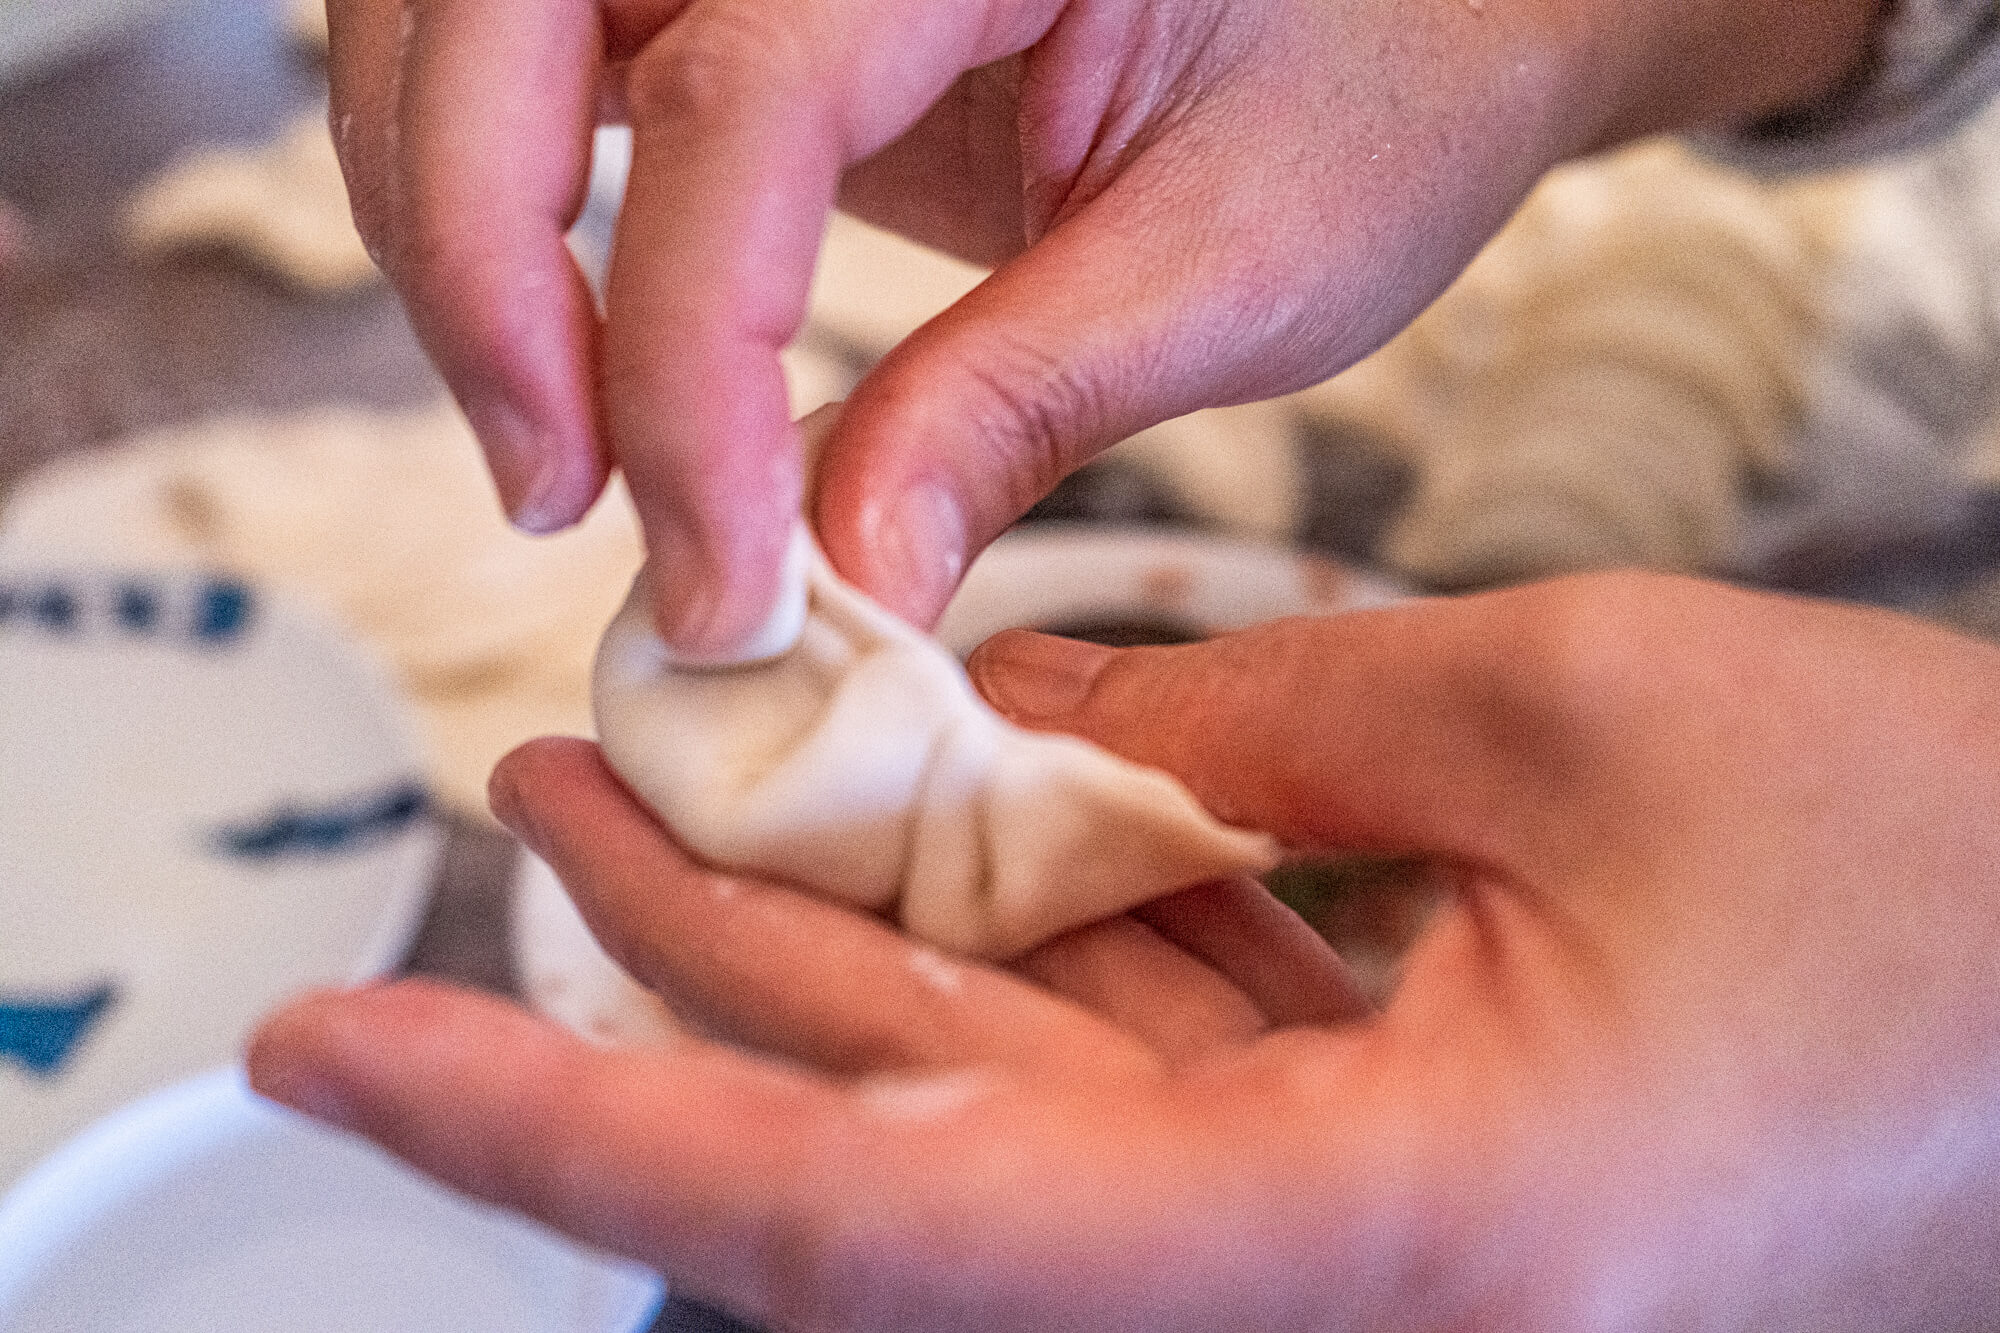
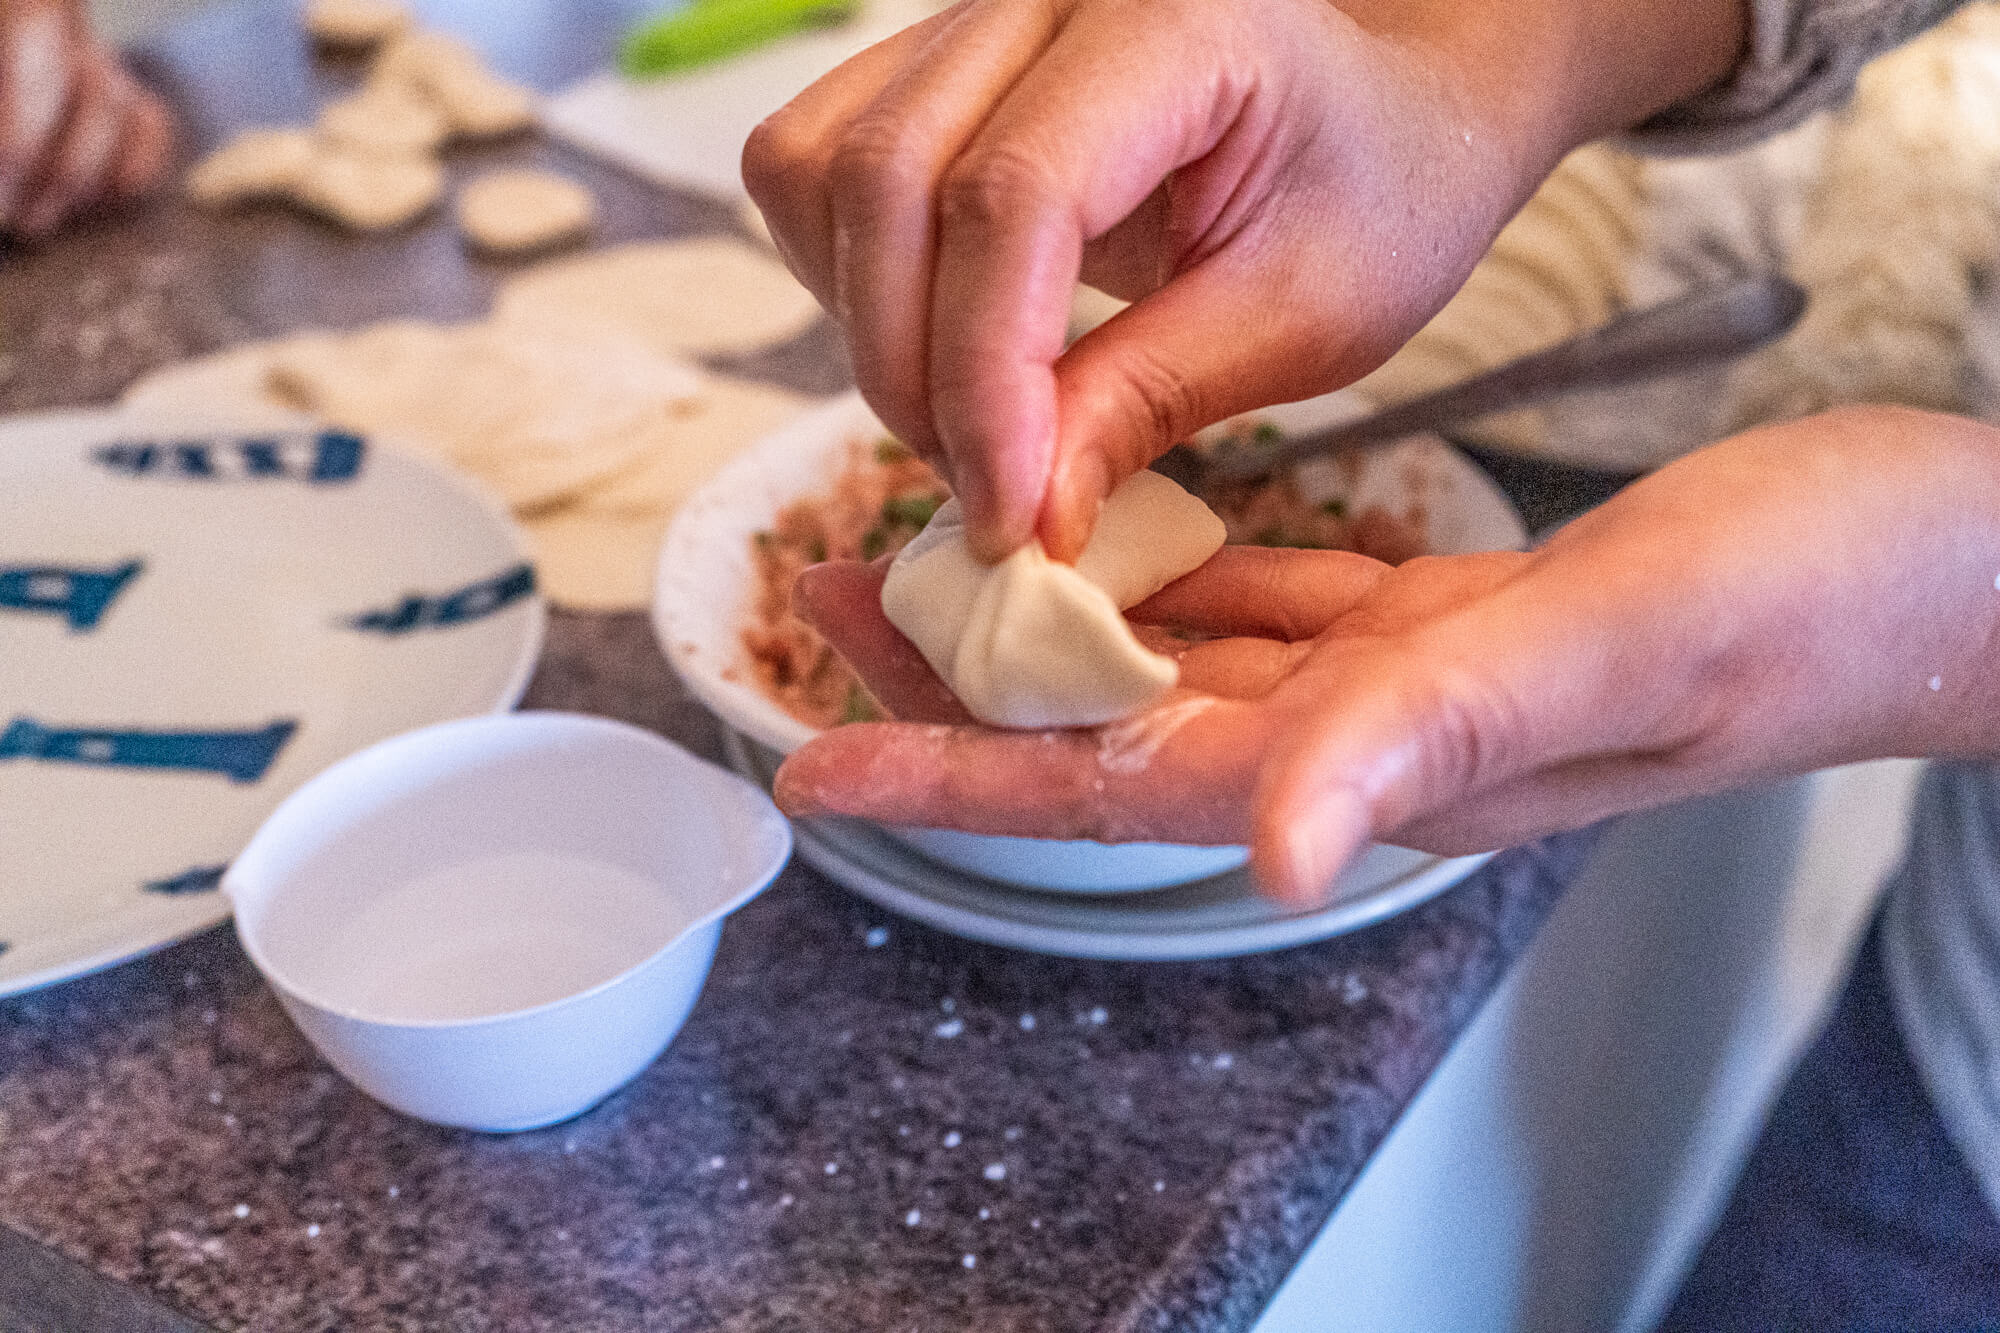
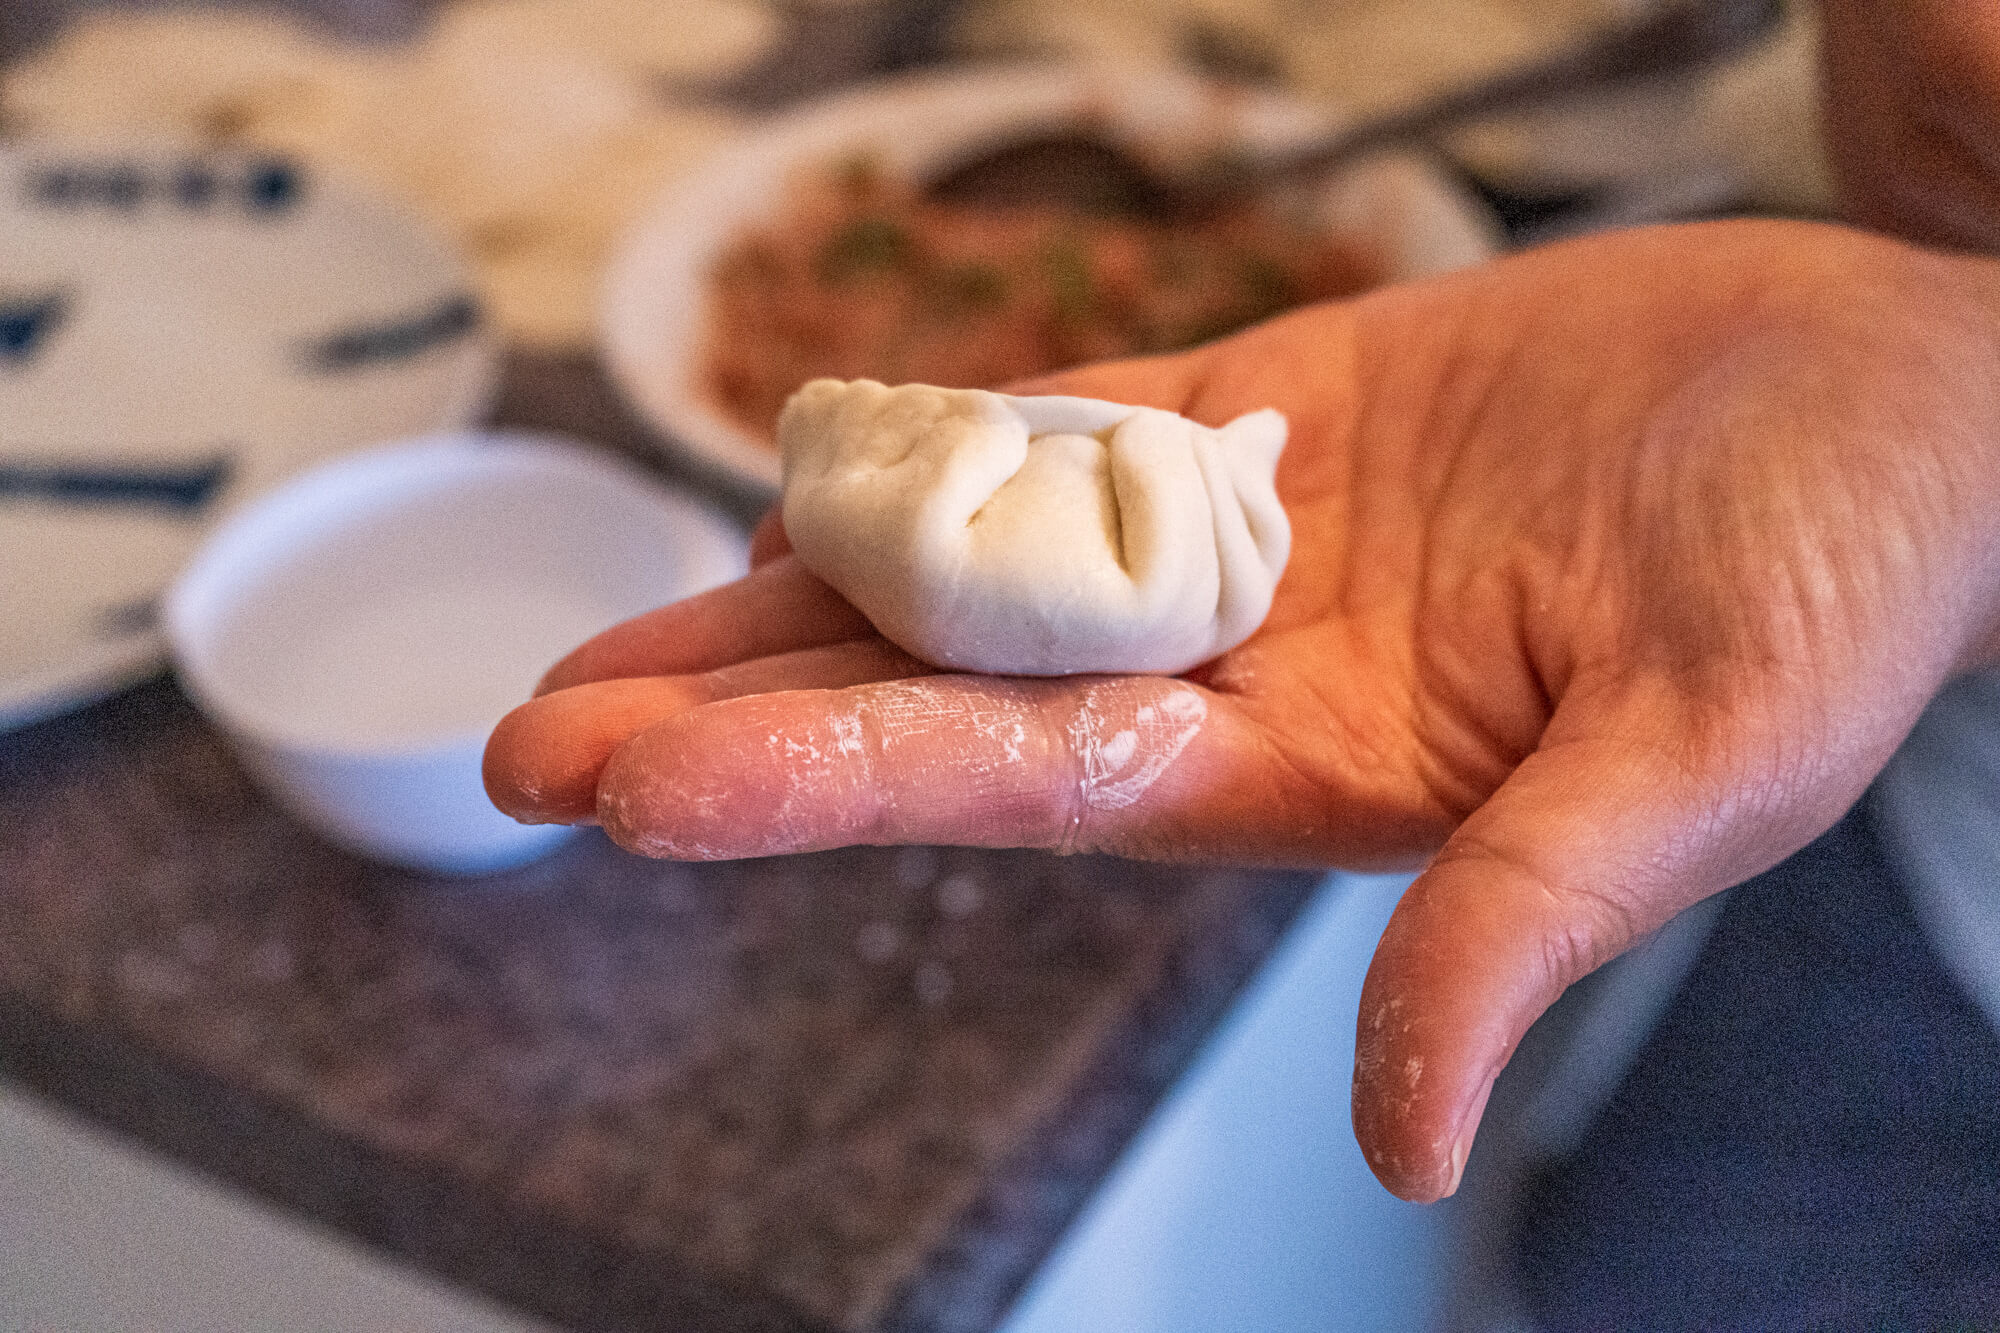
When you’re ready to start wrapping, remove your filling from the fridge and assemble your folding station. Grab a tablespoon for spooning your filling, and a small bowl of water to help seal the edges.
You can read this guide on how to fold dumplings for lots of fun ideas, but our favorite beginner-friendly method is to:
- With the wrapper in your palm, place a tablespoon of filling in the middle
- Dip your index finger in some water and line the edges so that your wrapper will be easier to seal later
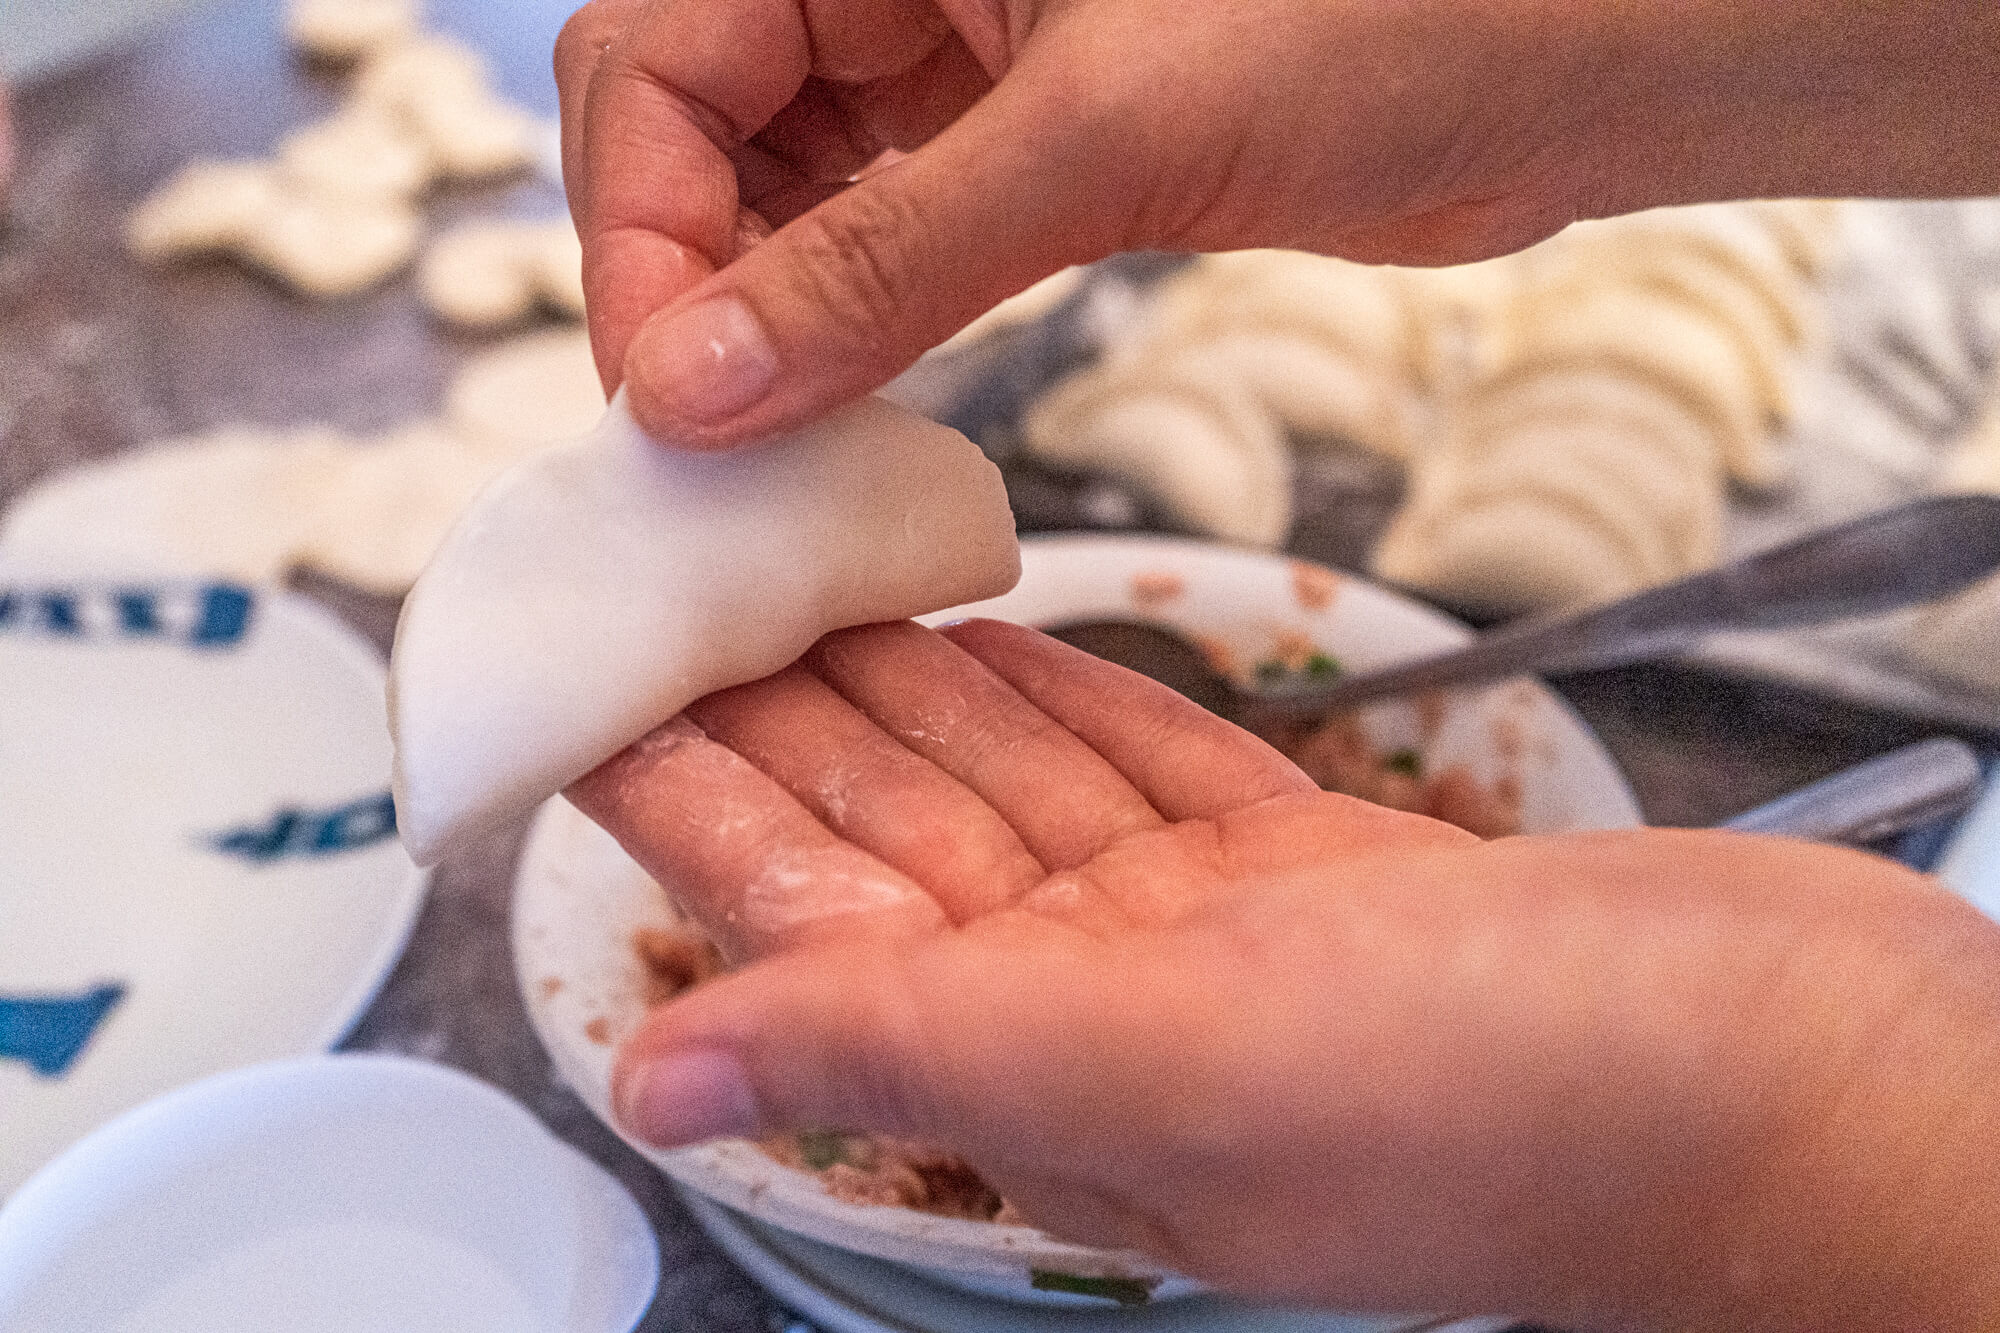
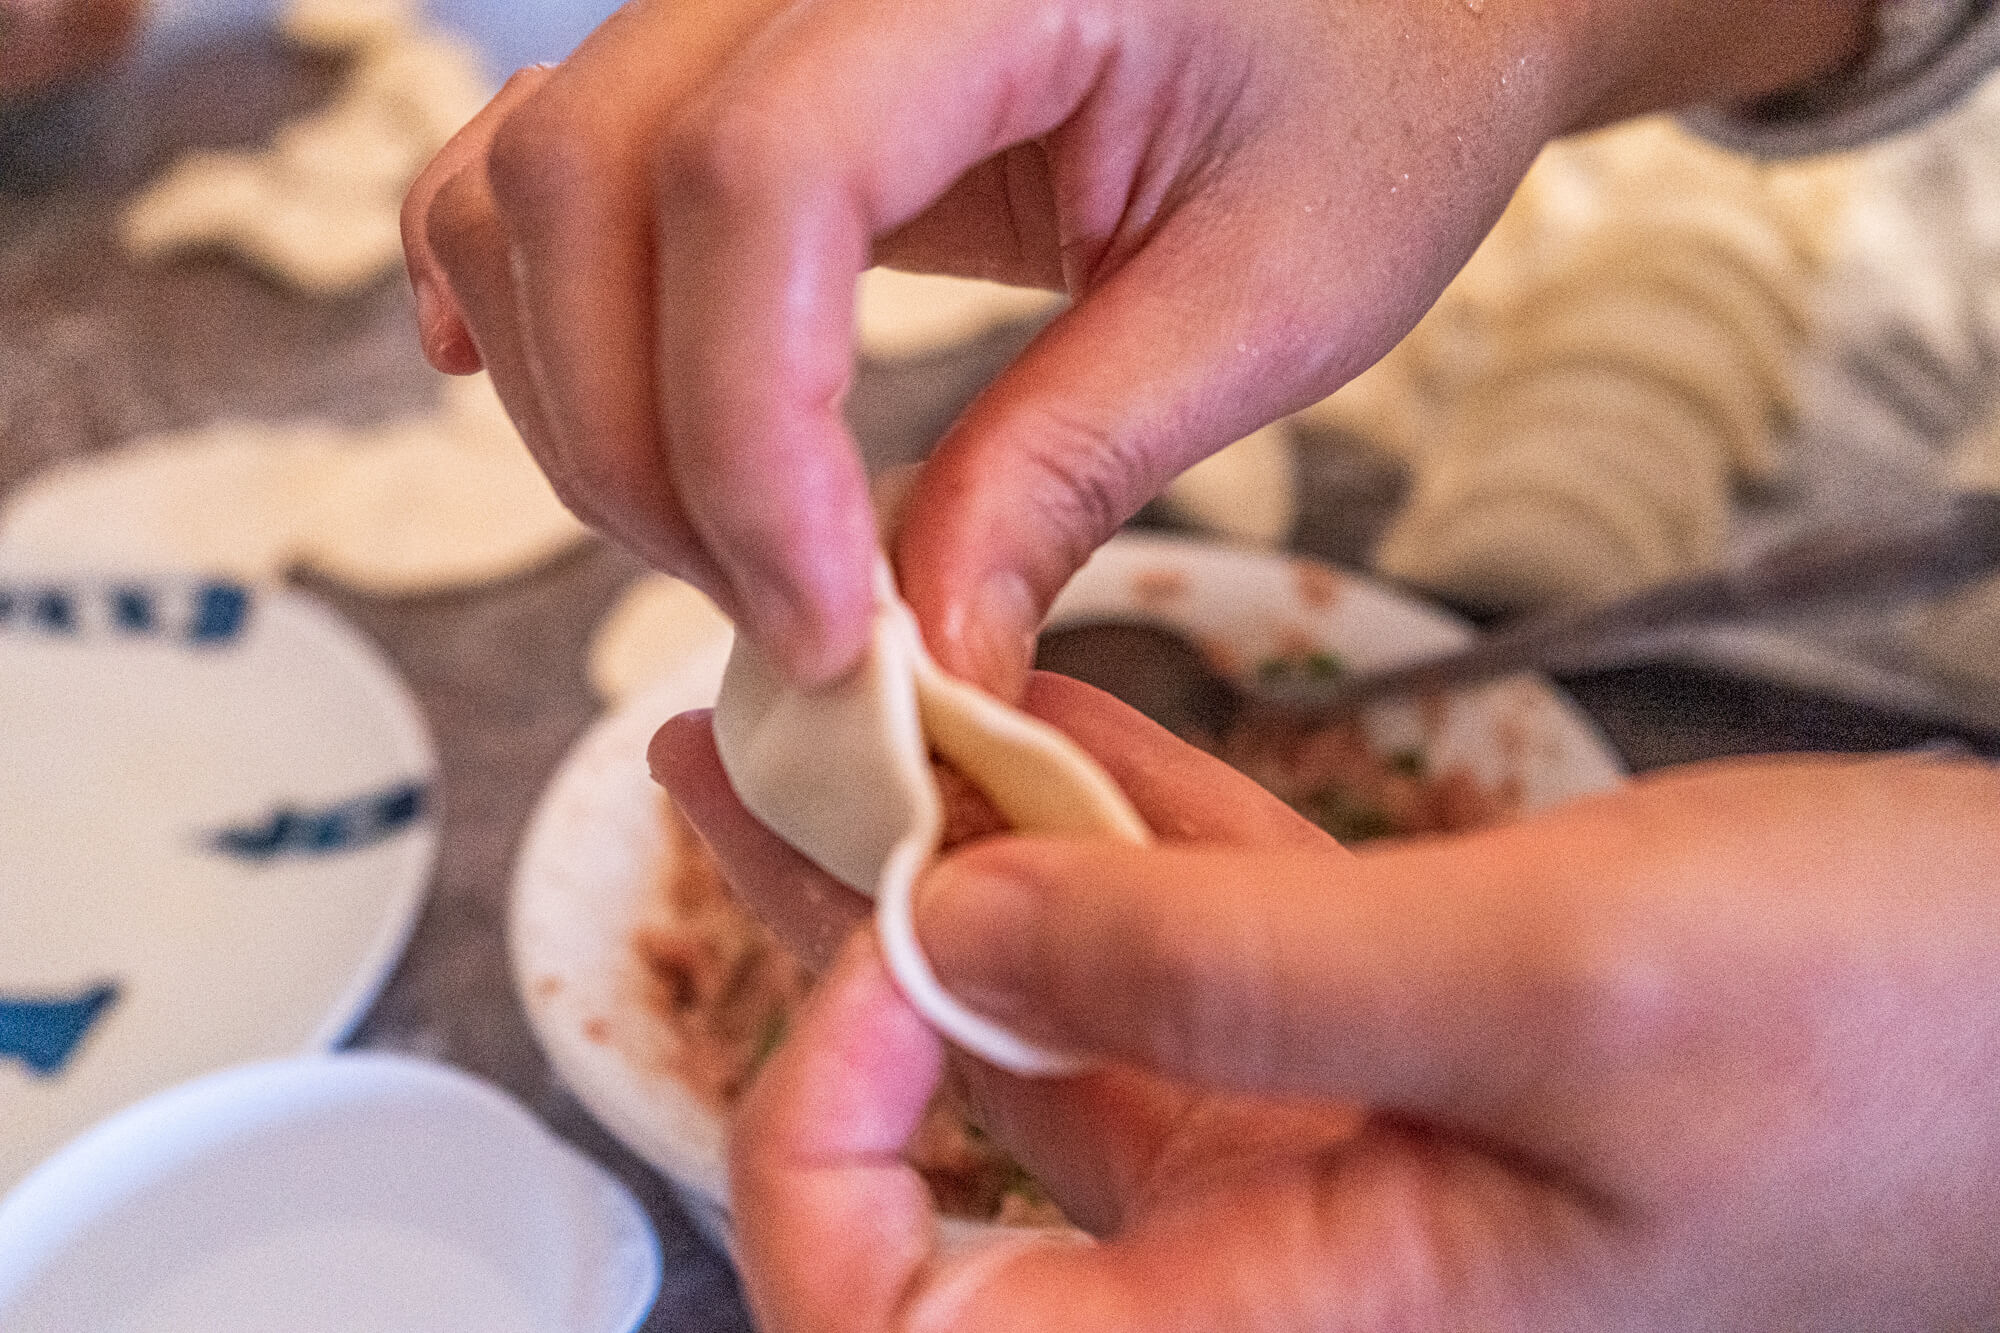
- Fold the wrapper in half, then pinch down the very center
- Fold inwards 2-3 times (or more if you want a more pleated look!) on each side
- Then firmly press it shut and repeat for all your dumplings
- NOTE: If using storebought wrappers, you should line the edges with a bit of water to help seal them shut tighter
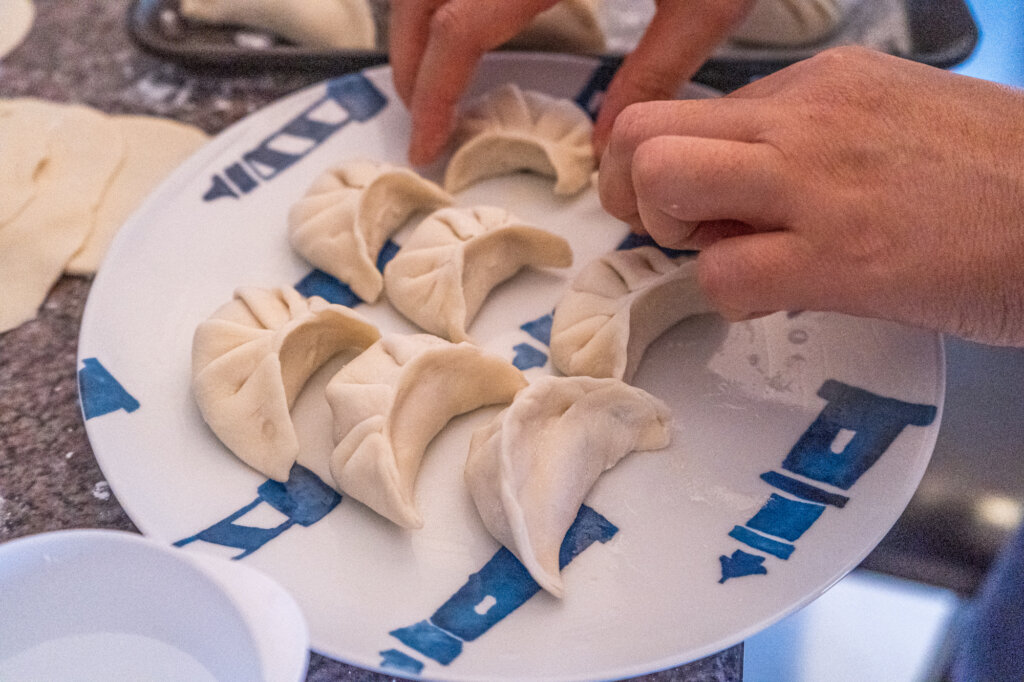
Once you have all your beautiful dumplings lined up, it’s time to cook them!
There are many ways you can cook your dumplings. Our go-to is steam frying. This is the technique that will give you “potstickers” which are steamed to delicate perfection, yet crispy on the bottom.
To steam fry your dumplings, heat a pan to medium heat and add a tablespoon of neutral oil (e.g. vegetable or canola).
Carefully place our dumplings (ideally spaced apart) and let them fry for a minute or two.
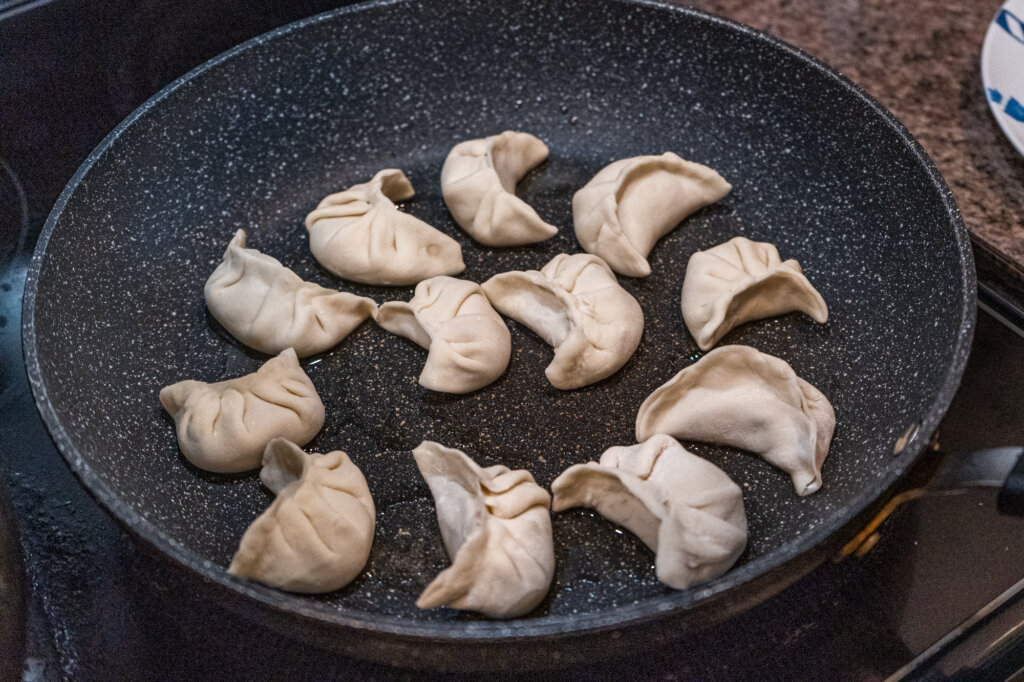
When the bottoms start to turn golden brown, then add a quarter cup of water into the pan and immediately put on a lid to keep the steam in.
Once the water has evaporated, remove the lid and continue to brown your dumplings until they’re your ideal crispiness. Sometimes we like to flip them over so we get golden brown crispiness on multiple sides, but the more traditional way is to only brown the bottoms.
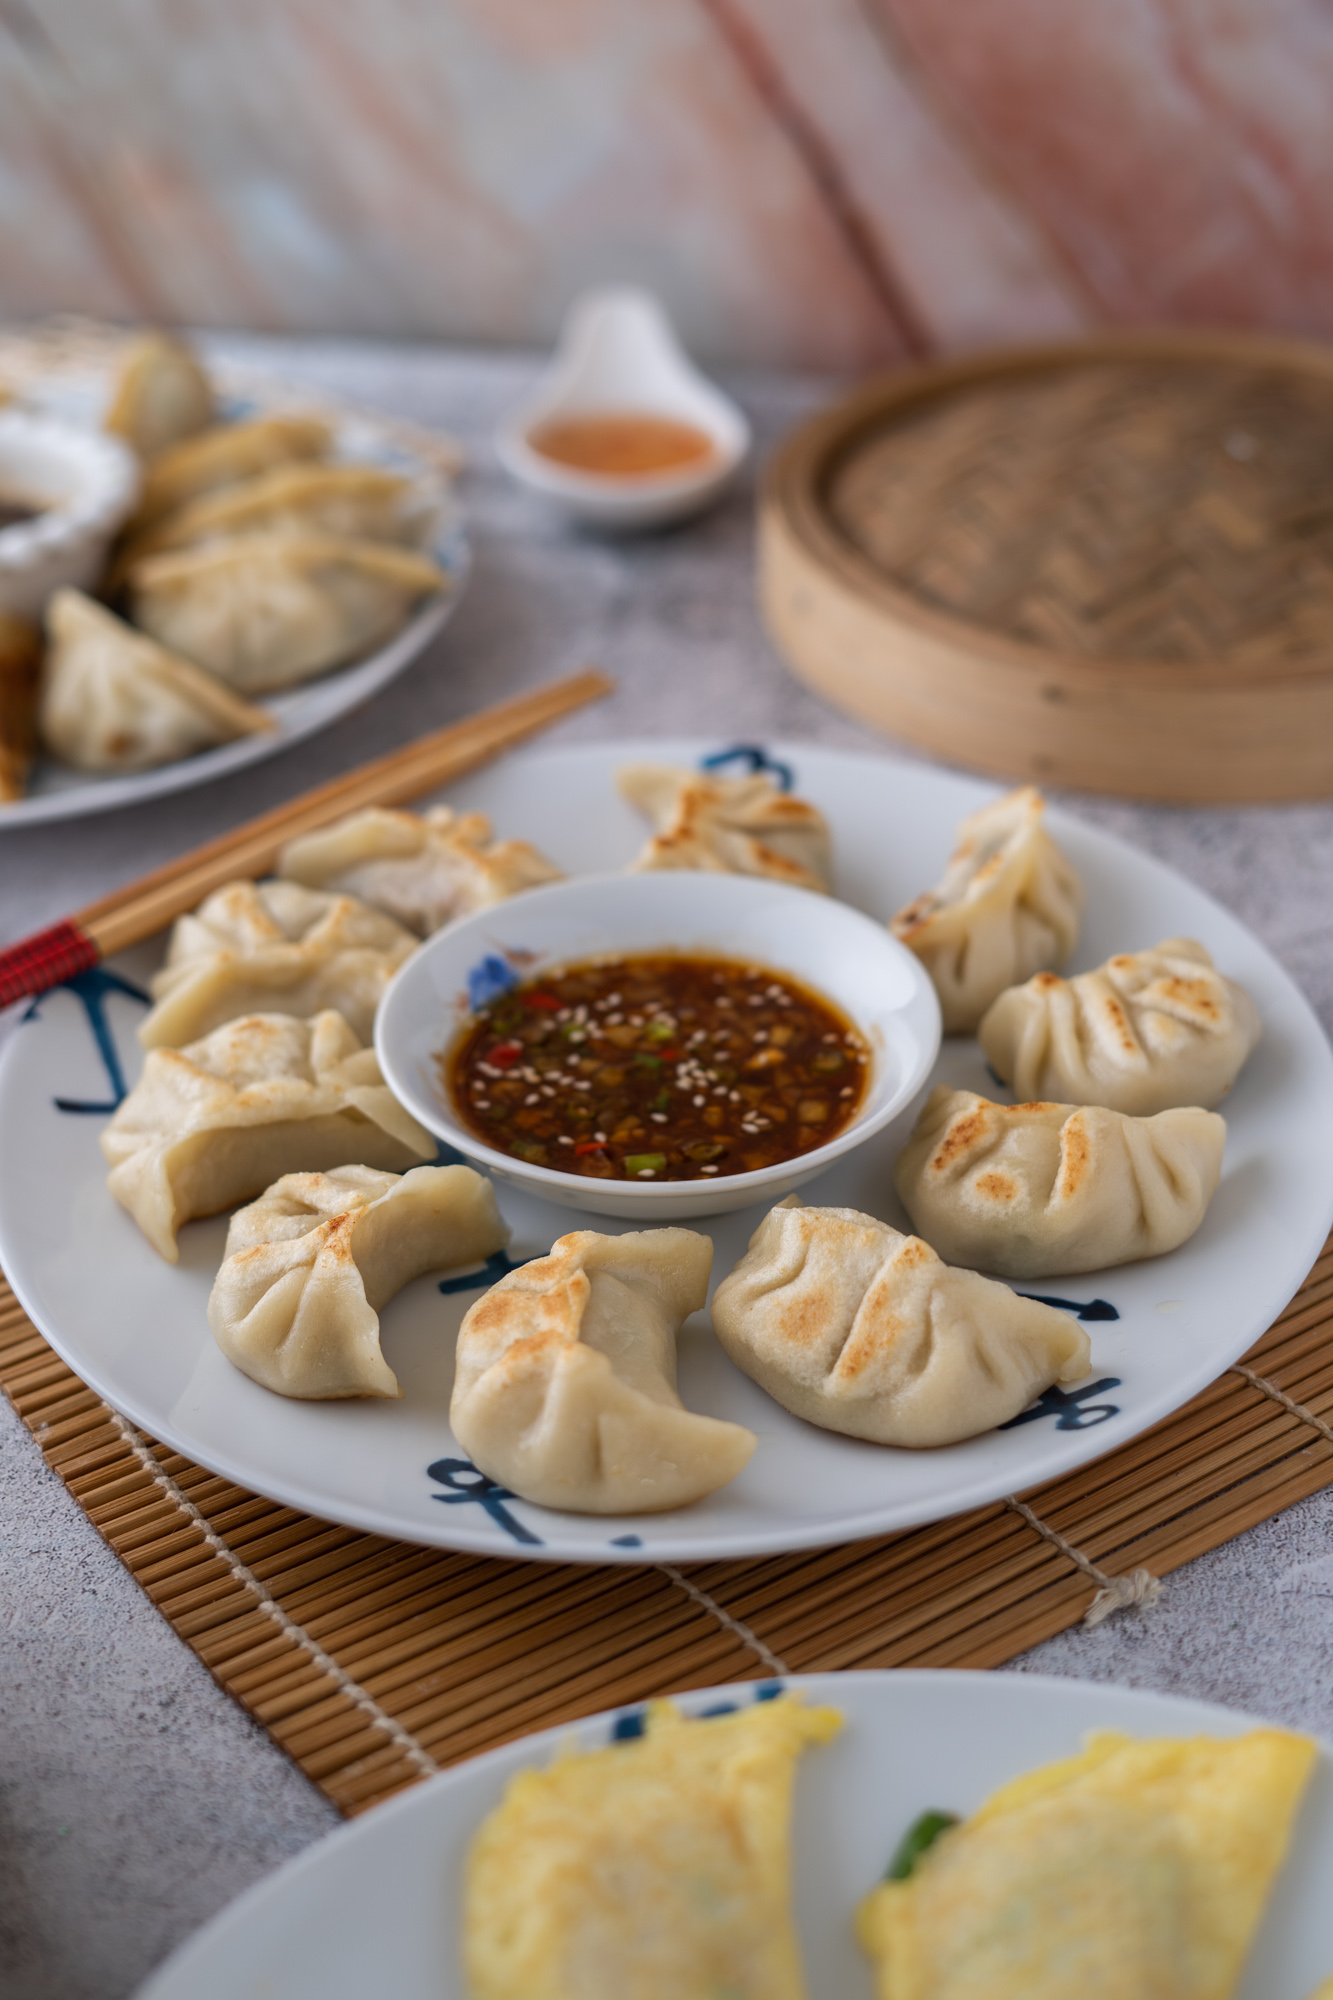
Serve with your favorite dumpling dipping sauce and enjoy!

Juicy & Foolproof Pork and Chive Dumplings (Potstickers)
If you’re looking for the most addictive and delicious homemade potstickers, these pork and chive dumplings are going to wok your world. Juicy, crispy, and packed with flavor, you won’t believe how easy they are to make yourself. Read on for the full recipe.
Ingredients
- 1 250g pack round dumpling skins/wrappers
- 500g (1 pound) Ground Pork
- 400g (14 oz) Chinese Chives, finely diced
- 1 tsp salt
- 1 tsp sugar
- 1 tsp chicken broth mix
- 1 tsp soy sauce
- 1 tsp oyster sauce
- A pinch of white pepper
- 1 egg
- 1 tbsp cornstarch
- 3 tbsp water
- 1 tbsp sesame oil
Instructions
- To prep the chives, chop them into small pieces.
- For the wrappers, either save time and go with storebought dumpling skins, or make them in advance through our dumpling wrapper recipe.
- In a large bowl, mix in all your ingredients (apart from the wrappers). Use a fork to stir everything clockwise for 2-3 minutes until well-mixed, with a whipped looking texture. Then store it in the fridge for 30 minutes or so for it to firm up.
- When you’re ready to start wrapping, remove your filling from the fridge and assemble your folding station. Grab a tablespoon for spooning your filling, and a small bowl of water to help seal the edges. Then, fold your dumplings according to your preferred method (refer to this guide on how to fold dumplings).
- To steam fry your dumplings, heat a pan to medium heat and add a tablespoon of neutral oil. Carefully place dumplings spaced apart and let them fry for a minute or two. When the bottoms start to turn golden brown, then add a quarter cup of water into the pan and immediately put on a lid to keep the steam in. Once the water has evaporated, remove the lid and continue to brown your dumplings until they’re your ideal crispiness.
- Serve with your favorite dumpling dipping sauce and enjoy!
We Hope You Enjoy Our Pork and Chive Dumpling Recipe!
Let us know in the comments if you have any questions, or be sure to let us know if you’ve tested the recipe out. We’re always looking to improve our recipes and make sure they taste great for everyone.